As an Amazon Associate, we earn from qualifying purchases. Some links on this site are affiliate links at no extra cost to you. Our recommendations are based on thorough research and editorial judgment.


How Do You Assemble A Portable Basketball Hoop Without Professional Help?

Assembling a portable basketball hoop independently requires methodical preparation and organization, encompassing several critical steps. Initially, one must select a flat surface and gather essential components including the base, poles, and hardware. Subsequently, the base is assembled, incorporating wheels and adding stabilization material such as sand. Following this, the pole sections are connected, ensuring secure bolt alignment. The backboard and rim are then attached with precision, while final height adjustments are made carefully, guaranteeing safety. Further insights on this process are available.
Key Takeaways
- Choose a flat area for assembly and gather all necessary components, tools, and a partner for safer handling.
- Assemble the base by attaching wheels, filling it with sand for stability, and sealing it tightly.
- Assemble the pole sections, ensuring proper alignment and securing with bolts according to the manufacturer’s specifications.
- Attach the backboard and rim by aligning pre-drilled holes and using the recommended hardware while having a helper if needed.
- Adjust the hoop height, securely engaging locks and frequently checking hardware tightness for safety during gameplay.
Preparation and Organization

You may be interested


Preparation and organization serve as critical foundations for the successful assembly of a portable basketball hoop, considerably influencing both the efficiency and safety of the process. Selecting an appropriate assembly area, such as a flat and level driveway, is essential, guaranteeing stability during and after assembly. Additionally, gathering all components—including the base, support braces, poles, and hardware—creates a streamlined workflow and minimizes interruptions. A thorough tools checklist should include a screwdriver, adjustable socket wrench, power drill, mallet, and level. Assembling with a partner is advised for handling larger parts safely. Furthermore, verifying each item in the kit against the manufacturer’s parts list guarantees completeness, reducing potential issues and fostering a sense of accomplishment within the community of DIY enthusiasts. Ensuring the stability of the hoop during assembly is crucial, as it will influence player safety during play.
Recommended Products

More Stable & Durable: The 10ft Basketball Stand comes with a sturdy stand and a upgraded base to which more water or sand can be added to ensure stability and durability. It also comes with wheels for easy transport and setup
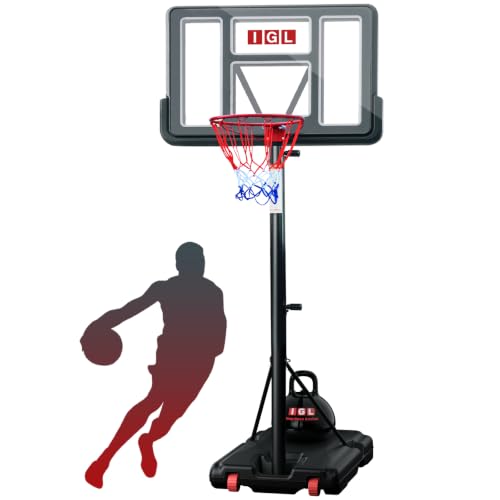
【Adjustable Height: 5.6-10 Feet】: The IGL adjustable basketball goal can be easily adjusted to 5 height levels. Use four rods for 8.0-10 feet and three rods for 5.6-7.6 feet (One more pole will make it more stable)

【SECURE STABILITY & DURABLE】Outdoor Basketball Hoop uses thickened steel support rods and weather-resistant coatings which are built to withstand various weather conditions. our basketball hoop features a large PC backboard with excellent visibility and impact resistance. The 18" metal basketball rim comes with a durable net, and the steel pole with a smooth finish can effectively prevent rust, ensuring long-lasting performance
Base Assembly and Support

Base Assembly and Support
The assembly of the basketball hoop‘s base and support structure is pivotal in establishing a solid foundation that enhances both stability and functionality during use.
Wheel Installation
- Begin by placing the base upside down, facilitating access to mounting areas.
- Insert the wheels into the axle holes, ensuring proper orientation, and verify their ability to spin freely for effective portability.
Base Filling****
- Unscrew the cap and fill the base with sand or water, prioritizing sand for superior stability despite the longer handling time.
- Use a level to confirm the base’s balance during filling, adjusting materials as needed to prevent rocking.
Once filled, reseal the cap tightly to eliminate leakage, followed by an evaluation of stability through gentle rocking, ensuring preparedness for subsequent assembly stages. Additionally, ensuring that the base is filled with sand or water enhances stability during gameplay, which is crucial for safety.
Recommended Products

✅ FITS MOST PORTABLE HOOP BASES - Hoop Secure is designed to fit most standard full-size, portable basketball hoop bases. No more ugly objects on your base leading to damage and mess.

MAXIMUM STABILITY: Stabilize basketball hoops, plastic sign bases, umbrella stands, volleyball nets, boxing equipment and more using the H2OLD Base Gel. This super absorbent polymer replaces sand or water used as a ballast weight. Combined with water, this powdered substance quickly turns into gel. The resulting firm and stable gel is freeze-thaw durable, making it perfect for use in any climate.

【Universal Design】The basketball hoop sandbag measures 39.57x24.61x4.72in, fitting most portable basketball hoop bases perfectly to keep your hoop clean and tidy. (Note: The product does not include a basketball hoop, plastic base, or sand.)
Pole Assembly and Connection

Following the establishment of a stable base, the subsequent assembly of the pole structure is imperative for achieving the desired performance and durability of the basketball hoop.
Commencing with pole identification, one must carefully distinguish the top, middle, and bottom sections before proceeding. Any temporary fasteners from shipment should be removed, and orientation marks must face correctly as per manufacturer specifications. After inspecting and cleaning pole ends, the top pole should be inserted into the middle pole, ensuring that holes align for telescoping adjustments or bolt securing.
Once all poles are positioned, bolts, nuts, or knobs should be firmly secured through the aligned holes. A thorough check must confirm that no wobble or misalignment exists, ensuring a sturdy framework ready for action. Additionally, ensuring the pole assembly follows the manufacturer specifications can further enhance the stability and performance of the hoop.
Recommended Products

REGULATION SIZE: The 18 in basketball rim is a great replacement for any worn or broken basketball hoop; Mounting bracket allows for installation on most major brand backboards such as Lifetime, Spalding, and CSG Crown, but check measurements to confirm

[ADJUSTABLE HEIGHT 4.82FT-8.53FT]: With raised maximum height 8.53ft, the kids basketball hoop outdoor is truly fit for growing kids. It has 12 levels of height adjustment, 4.82ft to 6.46ft with three poles installed, 6.88ft to 8.53ft with four poles installed.

STANDARD OFFICIAL SIZE-Our basketball nets feature 12 loops and measure 21 inches in total length to fit all standard-sized basketball rims.
Backboard and Rim Attachment

Assembling the backboard and rim requires precision and attention to detail, ensuring that both components are correctly aligned and securely attached for ideal gameplay.
First, identify the pre-drilled holes on the front of the backboard and confirm that mounting brackets on the back correspond with these holes to facilitate backboard alignment. Use the recommended bolts, washers, and nuts to attach the rim, ensuring to position rubber washers to prevent damage.
During rim tightening, utilize a helper for assistance, and employ props to support the rim for enhanced stability. Gradually tighten bolts, alternating between attachment points to maintain a level rim. Conclude the process by checking all connections for security and verifying minimal movement, affirming long-term stability for uninterrupted play. Additionally, ensure that the rim is compatible with standard basketball rim dimensions to guarantee a proper fit.
Recommended Products

Universal Size: This basketball rim is an 18-inch standard rim, making it an excellent replacement for any worn or damaged basketball hoop. This design typically conforms to standard basketball game rules and dimensions, suitable for various games and recreational activities, including both indoor and outdoor venues, meeting different usage needs.

Only compatible with Lifetime branded hoops | Keep original U-Bolt or contact Lifetime Products customer service for a new one.

⛹️【Important Note】 Before purchasing, please make sure bolt pattern shown in images will fit your hoop.
Height Adjustment and Safety Checks

Height adjustments for portable basketball hoops are essential for accommodating players of varying ages and skill levels, thereby enhancing the overall gameplay experience. Various height adjustment mechanisms facilitate these modifications, typically ranging from 7.5 to 10 feet in six-inch increments. Common adjustment types include Speed Shift and Strong Arm, which enable quick changes using one hand, alongside the Quick Adjust method that employs a broomstick.
Before making height adjustments, one must verify base stability and check for visible wear on components. It is critical for adults or capable individuals to engage locks fully, ensuring the hoop remains secure during play. Post-adjustment, it is advisable to inspect hardware for tightness, confirming that all parts of the adjustment mechanisms function properly and safely. Additionally, ensuring that the hoop has adjustable height features will further enhance safety and adaptability during gameplay.
Recommended Products

Ideal Basketball Hoops: The DUMOS Basketball Hoop is perfect for both indoor and outdoor use . It ' s a portable and adjustable system that can be utilized by different ages , with height adjustment from 6.1 feet to 10 feet , making it perfect for family fun

【40x24 IN Shatterproof Backboard】: The 40x24-inch acrylic backboard gives young players a bigger target to build confidence while providing a regulation feel for teens and adults. Shatterproof design withstands daily impact without cracking
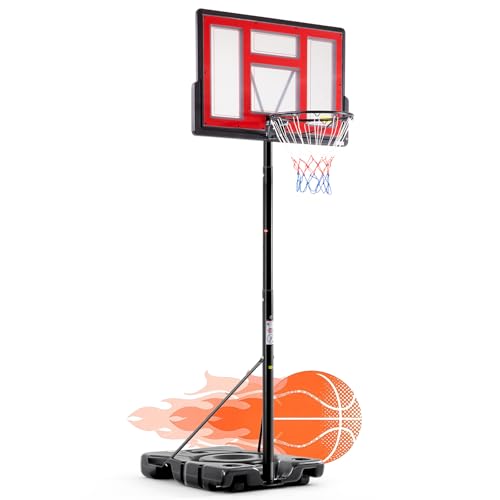
MORE STABLE & DURABLE: The 10ft Basketball Stand comes with a sturdy stand and a upgraded base to which more water or sand can be added to ensure stability and durability. It also comes with wheels for easy transport and setup
Frequently Asked Questions
Can I Assemble the Hoop Alone Without Assistance?
Yes, assembling the hoop alone is possible. Utilizing assembly tips and solo techniques, such as clamps and preliminary organization, enhances safety and efficiency, but may require additional time and patience to achieve a successful result.
How Long Does It Take to Assemble a Portable Hoop?
Assembly time for a portable basketball hoop varies, typically lasting between 30 minutes to 4 hours. Equipment quality and part complexity greatly influence this duration, shaping a smoother, shared experience for those involved in the assembly process.
What Is the Best Location to Set up My Hoop?
The best location for setting up a hoop includes an ideal surface, such as concrete, and significant space while considering proximity to neighbors. This fosters a friendly environment for play without disrupting nearby residents’ peace.
What Tools Are Absolutely Necessary for Assembly?
Essential tools for assembly include various wrench types, a cordless drill, safety gear, and a level. Assembly tips, like organizing hardware and pre-fitting bolts, enhance efficiency and guarantee a satisfying construction experience for all involved.
Is It Safe to Adjust the Height During Play?
Adjusting the height during play poses significant safety risks. Adhering to safety measures, such as ensuring no one is nearby during height adjustment, helps maintain a secure environment, allowing players to enjoy the game without fear.


